How to Lay Laminate Flooring Like a Pro: A Beginner's Guide
Jump to:
Laminate flooring is a popular choice for homeowners and DIY enthusiasts seeking an affordable, durable, and stylish flooring solution. Whether you're updating your living room, bedroom, or office, laminate flooring provides a variety of designs and finishes that mimic the elegance of hardwood, stone, or tile without the high costs or complex maintenance.
In this guide, we'll walk you through the entire floor process, from preparation to completion. You'll learn how to prepare your space, follow the step-by-step installation process, and ensure long-lasting results with proper post-installation care.
We’ll also share practical tips to avoid common mistakes and introduce you to essential tools that can make the job easier and more efficient.
Even if you're a complete beginner, this guide will equip you with the knowledge and confidence to install laminate flooring like a pro.
How to Install Laminate Flooring: Step By Step
Preparation Stage

Thorough preparation is crucial for a successful and long-lasting laminate flooring installation.
1. Gather Your Tools and Materials
Start by gathering the tools and materials you'll need, including a tape measure, utility knife, pull bar, spacers, tapping block, jigsaw or saw, underlayment, rubber mallet, T-square, and the laminate planks. You’ll also need cleaning supplies, a level, and possibly a patching compound for subfloor adjustments. Having these tools on hand before starting will save time and prevent interruptions during the installation process.
2. Prepare the Room
Next, prepare the room by clearing out all furniture and ensuring the workspace is free of obstructions. Remove existing floor coverings such as carpet, tile, or vinyl to expose the subfloor. Inspect the subfloor carefully—it must be clean, dry, and level to ensure the laminate planks lay evenly and securely.
Use a broom or vacuum to remove debris and dust that could affect the final installation. Check the subfloor for imperfections such as high spots or low areas. Sand down any raised sections and fill low areas with a leveling or patching compound, allowing it to dry completely before proceeding.
3. Check for Moisture Issues
Moisture is another critical consideration. Excess moisture in the subfloor can damage laminate over time, causing it to warp or deteriorate. If you’re working with a concrete subfloor, test for moisture levels and ensure they are below 12%. For added protection, install a moisture barrier beneath the underlayment to prevent water damage.
4. Install the Underlayment
Laying the underlayment is an important step that provides cushioning, noise reduction, and an additional moisture barrier. Follow the manufacturer’s instructions for installation, ensuring the underlayment is laid flat and without gaps or overlaps.
5. Acclimate the Laminate Planks
Before installation, allow the laminate planks to acclimate to the room's temperature and humidity for at least 48 hours. This step helps the planks adjust to the environment, reducing the risk of expansion, contraction, or warping after they are installed. Store the planks flat and in their packaging during this acclimation period.
6. Final Preparations
Finally, remove baseboards or molding to create a clean edge for the flooring. Ensure that all necessary materials and tools are readily accessible before starting the installation. With careful preparation, you'll create a strong foundation for a flawless and professional-looking laminate floor that will really last.
Installation Stage

Installing laminate flooring requires careful planning and execution for a seamless, polished result.
1. Dry Fit the Planks (Test Layout)
Start by dry fitting several rows of planks, a process where the planks are laid out on the floor without securing them to test the layout, check for alignment, and determine if adjustments to the first or last row are needed. This step ensures a visually balanced appearance and helps avoid surprises during installation.
2. Install the Underlayment
Once satisfied with the layout, install the underlayment according to the manufacturer’s instructions, rolling it out in strips parallel to the flooring direction and taping the seams for stability and moisture resistance.
3. Begin Installing the First Row
Begin the first row along the straightest wall, positioning the planks with their tongues facing the wall and using spacers to maintain a 1/4-inch expansion gap around the room's perimeter. This gap allows the flooring to expand and contract with temperature and humidity changes. Lock the planks together at their short ends, using a rubber mallet or tapping block for a snug fit.
4. Continue Row by Row
Proceed row by row, staggering the plank seams by at least 6 inches to create a natural look and enhance the floor’s structural integrity. Insert the tongue of each plank into the groove of the previous row at a slight angle, then lower it and tap it into place for a tight fit. Regularly check for alignment and spacing as you work to maintain squareness.
5. Install the Final Row
For the final row, measure the remaining space carefully, accounting for the expansion gap, and cut the planks lengthwise to fit. Use a pull bar to snug these last pieces into place securely. Complete the process by removing the spacers and installing baseboards or molding to cover the gaps and add a finished look.
If necessary, add transition strips where the laminate meets other flooring. With these steps, your laminate floor will be ready to enjoy with a professional, durable finish.
Post-Installation Stage

Completing the post-installation phase is essential for ensuring the durability and polished appearance of your laminate flooring.
1. Remove Spacers and Inspect the Floor
Begin by carefully removing all spacers used to maintain the expansion gap around the room’s perimeter. This gap is crucial for allowing the floor to expand and contract with changes in temperature and humidity. Inspect the edges of the flooring to ensure the planks are aligned and the gap is consistent.
2. Clean the Floor
Next, thoroughly clean the floor to eliminate any dust, debris, or adhesive residue left from the installation process. Use a soft-bristled broom or a vacuum cleaner with a hard floor attachment to prevent scratches. If needed, follow up with a damp mop and a laminate-specific cleaner, taking care not to oversaturate the floor, as excessive moisture can damage the laminate.
3. Install Transition Strips (If Needed)
If your laminate flooring meets other types of flooring or spans multiple rooms, install transition strips for a smooth, professional finish. These strips not only protect the laminate's edges but also conceal expansion gaps. Measure and cut the transition strips to fit precisely, and secure them following the manufacturer’s instructions, which may involve adhesive or snapping them into tracks.
4. Reattach Baseboards or Molding
Reattach baseboards or quarter-round moldings removed earlier, ensuring they cover the expansion gaps while allowing the flooring to move freely. This step gives the room a finished, seamless look.
5. Final Cleaning & Floor Protection
Afterward, perform a final cleaning using a slightly damp mop or cloth to remove any remaining dust. Allow the flooring to settle for a day or two before moving furniture back into the room. To protect your new flooring, use felt pads under furniture legs to prevent scratches and dents.
With these steps completed, your laminate flooring will be secure, visually appealing, and ready to enhance your space for years to come.
Tips and Common Mistakes When Laying Laminate Floor
When laying laminate flooring, a few useful tips can make the process smoother and more successful.
-
Always acclimate the laminate planks to the room’s temperature and humidity for at least 48 hours before installation to prevent warping and expansion issues.
-
Measure your room and plan your layout carefully to avoid awkwardly small planks at the edges.
-
Use spacers to maintain an expansion gap around the room's perimeter, allowing the floor to expand and contract with temperature changes.
-
Ensure your subfloor is clean, level, and dry, as any imperfections can lead to uneven flooring.
Avoiding these common mistakes can help ensure a smooth and durable laminate flooring installation:
-
Not properly staggering the seams of the planks, which can weaken the floor's structural integrity and create an unsightly pattern.
-
Failing to install a proper underlayment, which is crucial for moisture protection and cushioning.
-
Using too much force when tapping planks together, as this can damage the locking mechanisms.
-
After installation, promptly clean any adhesive residue and ensure all transition strips and baseboards are securely in place to protect the edges of your new floor.
Essential Tools For Installing Laminate Flooring
Even with all the knowledge, you have (hopefully) picked up from reading this article, you will not get very far without having the right tools. Some of the things you might need are as follows.
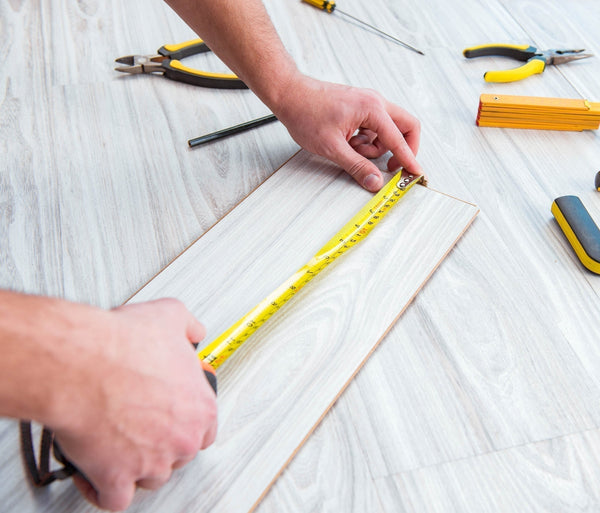
1. Tape Measure
A tape measure is essential when installing laminate flooring, as it ensures precise measurements and accurate cuts of the planks. This precision leads to a seamless fit, preventing gaps or uneven edges in your flooring. We would recommend this sturdy 5.0 m tape measure from Tajima, which is twice the thickness of a standard tape measure and comes with a heavy-duty belt clip.

Tajima Sturdy 5.0m Tape Measure GASFG3GLM25-50BL
$34.00
2. Level
A level is essential when installing laminate flooring to ensure the subfloor is perfectly even. This precision prevents dips or high spots that could lead to an uneven and unstable laminate surface, ensuring a smooth and durable floor. This 300mm spirit level, also from Tajima, is perfect for the job.

Tajima Box Level Spirit Level 300mm BX2-S30
$20.00
3. Hammer
A flooring hammer, often used with a tapping block, is essential when installing laminate flooring. It allows you to securely tap the planks into place without damaging their edges, ensuring a tight and seamless fit between each piece. A good example of such a hammer is this wooden-handled flooring hammer from Dogyu.

Olfa Retractable Craft Utility Knife 141BS
$7.99
4. Utility Knife
A utility knife, such as this one from Olfa or this one from Tajima, is indispensable for installing laminate flooring, enabling precise cuts around obstacles and along edges to ensure a seamless fit. Its sharp blade allows for accurate trimming, which is essential for achieving a professional finish.

Olfa Retractable Craft Utility Knife 141BS
$7.99
5. Laminate Flooring Cutter
A laminate flooring cutter is essential for achieving precise, clean cuts on laminate planks. This tool enables you to trim flooring to the required size, navigate around obstacles, and create smooth, professional edges without the dust and noise associated with power saws. Utilizing a laminate flooring cutter ensures a seamless and accurate installation, enhancing the overall appearance and durability of your flooring project.
6. Spacers
Spacers are essential during laminate flooring installation to maintain uniform gaps between the planks and walls. These gaps accommodate the flooring's natural expansion and contraction due to temperature and humidity changes, preventing issues like buckling or warping. By ensuring consistent spacing, spacers help preserve the floor's structural integrity and appearance over time.
7. Safety Gear
Wearing safety gloves, such as these from Atom, protects your hands from sharp edges, splinters, and potential injuries, ensuring a safer work environment.

Atom Extra Durable Non-Slip Work Gloves 157
$5.75
Safety goggles are also essential when installing laminate flooring, as they protect your eyes from dust, debris, and potential splinters, ensuring a safer working environment.
Laying Laminate Flooring Like A Pro
Installing laminate flooring may seem like an overwhelming task. However, by following the steps outlined in this guide—thorough preparation, careful installation, and meticulous post-installation care—you can transform any space into a stylish and functional area with confidence. Remember, success lies in the details: acclimating planks, ensuring an even subfloor, maintaining expansion gaps, and using the right tools for the job.
With patience and dedication, even a beginner can create a durable and visually stunning floor that enhances any space for years to come.

0 comments